TL;DR
Creating AI images with Nano Banana 2 takes three steps. First, open the Text-to-Image tool and type a description of the image you want. Second, pick a style, set your aspect ratio, and hit Generate. Third, download your finished image or send it straight to Image-to-Image for further refinement. The entire process takes under a minute from prompt to finished result.
If you have never written a prompt before, skip the guesswork entirely: open the Image Prompt Generator, describe your idea in a few casual words, and it will produce a detailed, optimized prompt you can copy directly into the image generator. This is the fastest way to go from "I have an idea" to "I have a professional-quality image."
Nano Banana 2 is built for creators at every level. Beginners get free credits to explore every tool without risk. Experienced users get fine-grained control over styles, parameters, and multi-tool workflows that chain prompt generation, image creation, style transfer, and video animation into a single platform.
Create your first AI image → | Generate a prompt for me → | Transform an existing image →
Nano Banana 2 turns your ideas into stunning AI-generated images in seconds — with tools for text-to-image, image-to-image, prompt generation, and video creation all in one platform.
Getting Started with Nano Banana 2
Before you generate your first image, take two minutes to understand the platform layout. Nano Banana 2 is designed to feel intuitive from the first visit, but knowing where everything lives will save you time and help you discover capabilities you might otherwise miss.
Creating Your Account
Head to nanobanana2app.com and click Sign Up in the top navigation. You can register with an email address or sign in with a Google account for one-click access. The process takes about 30 seconds — no credit card required, no lengthy onboarding forms, no mandatory tutorial before you can start creating.
Once you are logged in, you land on the home page with direct access to every tool in the platform. There is no setup wizard or configuration step. You are ready to generate immediately.
Navigating the Interface
The Nano Banana 2 interface is organized around its core tools, each accessible from the main navigation:
- Text-to-Image — Generate images from text descriptions. This is where most users start and where you will spend the majority of your time.
- Image-to-Image — Transform existing images through style transfer, enhancement, and creative modification. Upload a photo and describe how you want it changed.
- Image Prompt Generator — Turn brief descriptions into detailed, optimized prompts. This is your shortcut to professional-quality results without mastering prompt engineering.
- Text-to-Video — Generate video clips from text descriptions.
- Image-to-Video — Animate static images into dynamic video clips.
- Video Prompt Generator — Create optimized prompts specifically for video generation.
Each Nano Banana tool has its own dedicated page with a clean, focused interface. You will not find cluttered dashboards or hidden menus — every control is visible and clearly labeled.
Free Credits and How They Work
New accounts receive free credits that let you explore every tool on the platform without spending anything. Each generation type has a defined credit cost, and you can see your remaining balance in your account dashboard at any time.
Here is what matters: the free credits are enough to complete every step in this tutorial and still have room to experiment afterward. You can generate multiple text-to-image results, try image-to-image transformations, use the prompt generator, and even create a video clip — all within the free tier.
When you are ready for more, the pricing page has straightforward credit packages. But start with the free credits. They are designed to give you a genuine feel for the platform's capabilities before you decide whether to invest further. For a detailed breakdown of what you get at each tier, see our Nano Banana 2 Free & Pricing Guide.
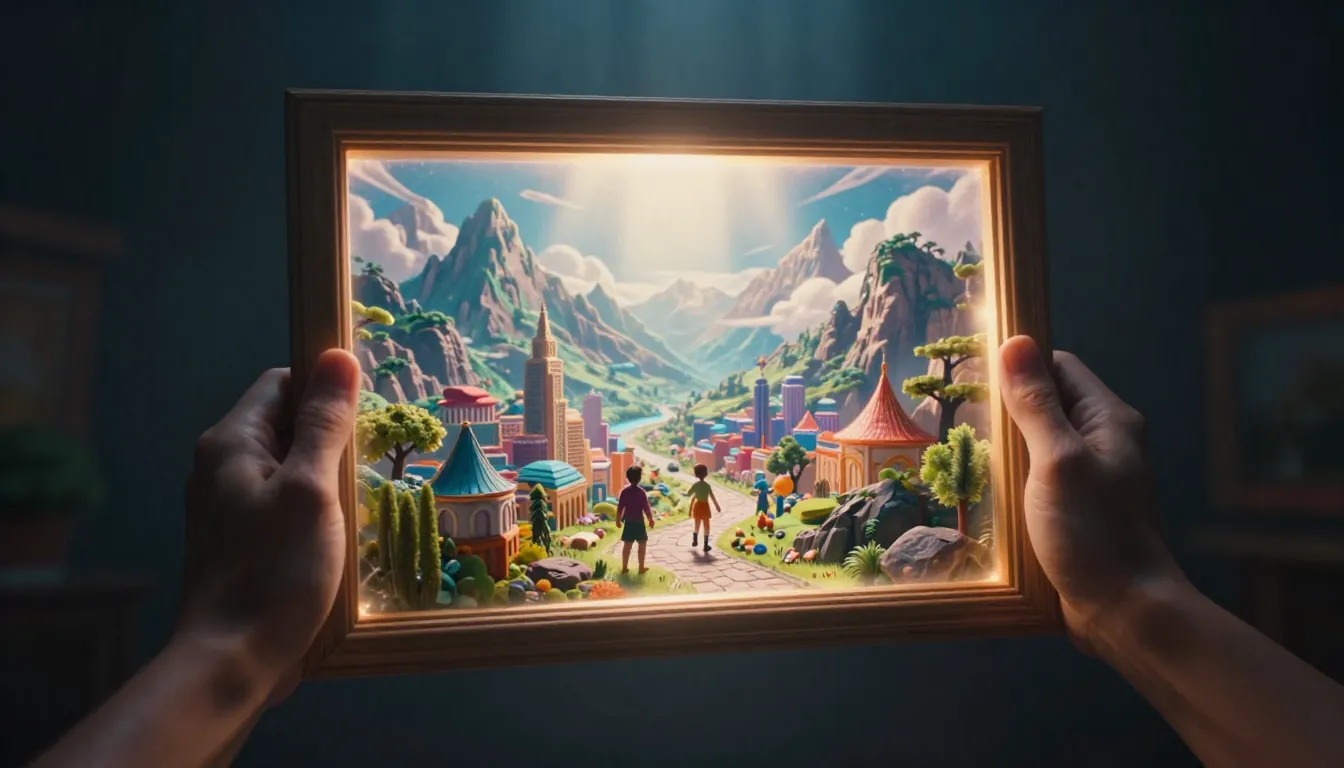
The Nano Banana 2 interface gives you direct access to every AI generation tool from the main navigation — no setup required, no hidden menus.
Step 1: Text to Image — Your First AI Image
This is where the magic starts. Text-to-Image is the core of Nano Banana 2 and the tool you will use most often. You describe what you want in words, and the Nano Banana AI generates a matching image in seconds. Let's walk through the entire process from opening the tool to downloading your finished result.
Open the Text-to-Image Tool
Navigate to Text-to-Image from the main navigation or home page. You will see a clean interface with a text input area (the prompt box), style selection options, parameter controls, and a generate button. Everything you need is on a single page — no tabs to switch between, no settings buried in submenus.
Write Your First Prompt
The prompt is the most important input. It is your description of the image you want the AI to create. For your very first generation, keep it simple and specific. Here is a solid starting prompt:
A young woman sitting in a sunlit café, golden morning light
streaming through large windows, warm coffee cup in her hands,
soft bokeh background, natural and relaxed pose, photorealistic
style, warm color palette
Notice what this prompt does well: it describes a clear subject (a young woman), a specific setting (sunlit café), lighting conditions (golden morning light), key details (coffee cup, windows), a photographic quality (soft bokeh), and an overall mood (natural, relaxed, warm). Each element gives the AI concrete guidance about what to create.
Compare that to a vague prompt like "a woman in a café." Both will produce an image, but the detailed prompt produces an image that looks intentional and professional, while the vague prompt leaves too many decisions to chance.
Choose Your Style and Parameters
Below the prompt box, you will find style options and parameter controls:
Style selection. Nano Banana 2 offers multiple visual styles — photorealistic, digital art, anime, illustration, and more. For your first image, photorealistic is a strong default choice. It produces images that look like professional photographs and tends to handle a wide range of subjects well.
Aspect ratio. Choose the shape of your output image. Common options include 1:1 (square, great for social media posts), 16:9 (widescreen, ideal for desktop wallpapers and YouTube thumbnails), 9:16 (vertical, perfect for phone wallpapers and Instagram stories), and 3:4 or 4:3 for portrait and landscape photography compositions. Pick the ratio that matches where you plan to use the image.
Model selection. If available, you may see options for different AI models. Each model has its own strengths — some excel at photorealism, others at artistic styles. When starting out, the default model is a reliable choice. As you gain experience, experiment with different models to discover which ones best match your creative preferences.
Generate and Download
Hit the Generate button. The AI processes your prompt and produces a result — typically within 10-30 seconds depending on the model and current server load. You will see a progress indicator while the image is being created.
When the image appears, you have several options:
- Download the image directly to your device in high resolution.
- Send to Image-to-Image to refine, restyle, or modify the result further.
- Generate again with the same prompt to see a different interpretation — AI generation is non-deterministic, so the same prompt produces different results each time.
- Modify the prompt and regenerate to iterate toward your ideal result.
Your first AI image is done. It really is that fast. From opening the tool to holding a finished image, the entire process takes under a minute.
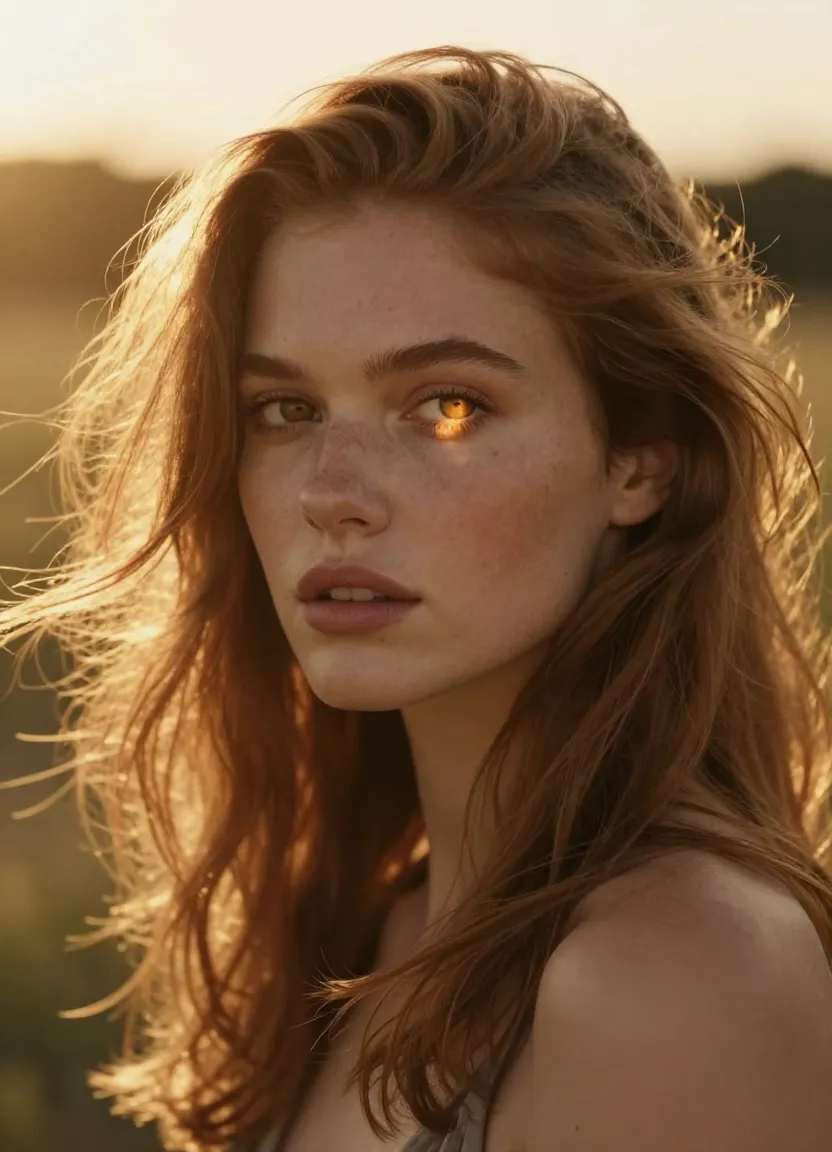
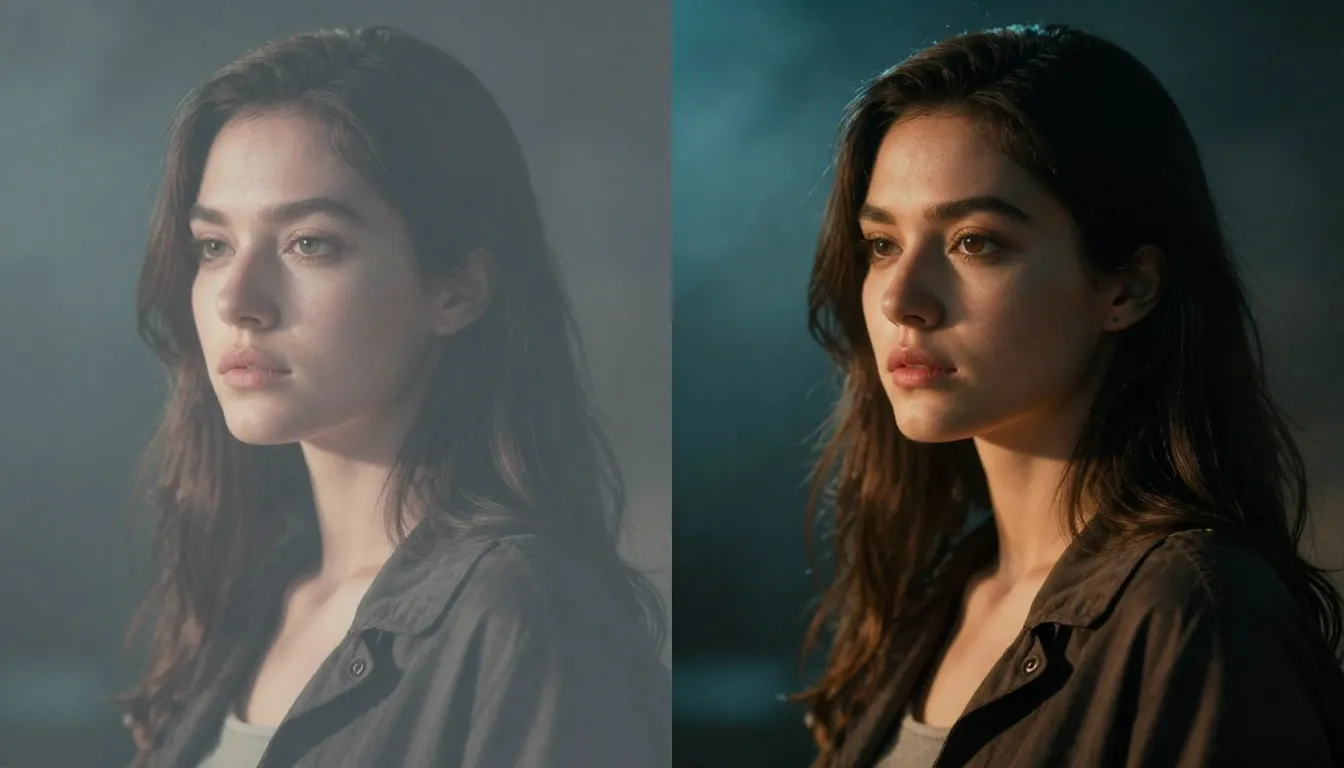
Your first AI-generated image on Nano Banana 2 — a detailed prompt with specific lighting and mood descriptors produces professional-quality results on the first try.
Why Prompts Matter: Basic vs. Optimized
The difference between a basic prompt and an optimized prompt is dramatic. To illustrate, here is a side-by-side comparison of results from the same subject with different prompt quality:
Basic prompt:
a cat sitting on a tableOptimized prompt:
A fluffy orange tabby cat sitting elegantly on a rustic wooden table,
soft window light creating gentle shadows, shallow depth of field
with creamy bokeh background, warm golden tones, pet photography
style, sharp focus on the cat's eyes, whiskers catching the light,
cozy home interior setting, high resolution, professional quality
The basic prompt produces a technically acceptable image — yes, it is a cat on a table. But the optimized prompt produces an image that looks like it came from a professional pet photographer's portfolio. The difference is not in the AI's capability; it is in the quality of the instruction you provide.
This is exactly why Nano Banana 2 includes the Image Prompt Generator. It takes your basic idea and transforms it into an optimized prompt automatically, so you get professional results even if you have never written a prompt before.
The same subject, dramatically different results. A detailed, optimized prompt (right) produces professional-grade images while a basic prompt (left) gives the AI too little direction.
Step 2: Image to Image — Transform Existing Photos
Text-to-Image creates images from scratch. Image-to-Image transforms images that already exist. This is the tool you reach for when you have a photo, a screenshot, an existing design, or a previously generated image that you want to modify, restyle, or enhance.
The use cases are wide-ranging: apply a completely different artistic style to a photograph, transform a quick sketch into a polished illustration, enhance the quality of a low-resolution image, change the mood or color palette of an existing design, or create variations of an AI-generated image you already like.
Upload Your Reference Image
Navigate to Image-to-Image and upload the image you want to transform. The platform accepts common image formats — JPG, PNG, and WebP all work. You can upload a personal photo, a screenshot, a design mockup, or an image you previously generated with Text-to-Image.
The reference image serves as the structural foundation for the transformation. The AI uses it to understand the composition, subject placement, spatial relationships, and visual elements of your scene. What changes is the style, mood, quality, or specific elements you describe in your prompt.
Choose Your Transformation
After uploading, write a prompt that describes the transformation you want. This is where Image-to-Image shines — the prompts are about change and direction rather than building from scratch. Here are some examples:
Style transfer: "Transform this photo into a Studio Ghibli animation style, soft watercolor textures, dreamy pastel colors, whimsical atmosphere"
3D figurine: "Convert this portrait into a cute 3D figurine, chibi proportions, smooth plastic texture, miniature figure sitting on a display stand, toy photography lighting"
Artistic reinterpretation: "Reimagine this scene as a Renaissance oil painting, dramatic chiaroscuro lighting, rich earth tones, classical composition, visible brushstrokes"
Mood shift: "Same scene but at sunset, warm golden and amber tones, long shadows, cinematic color grading, dramatic sky with clouds"
Adjust Strength and Parameters
Image-to-Image typically includes a strength or influence slider that controls how much the AI departs from your original image. A low strength keeps the output close to the original — subtle style changes while preserving most of the composition. A high strength gives the AI more creative freedom, resulting in more dramatic transformations but potentially more deviation from the original layout.
For your first transformation, start in the middle. You can always regenerate with a higher or lower strength once you see the initial result and understand how the slider affects the output.
Review Your Results
Generate the transformation and review the output. Image-to-Image is inherently iterative — your first result might be close but not perfect. Adjust the prompt, modify the strength, or try a completely different style direction. Each iteration takes seconds, so experimenting is fast and inexpensive.
The most powerful workflow combines Text-to-Image and Image-to-Image: generate a base image from text, then use Image-to-Image to refine it across multiple iterations until it matches your vision exactly. This two-step approach gives you both the creative freedom of generation from scratch and the precision of guided refinement.
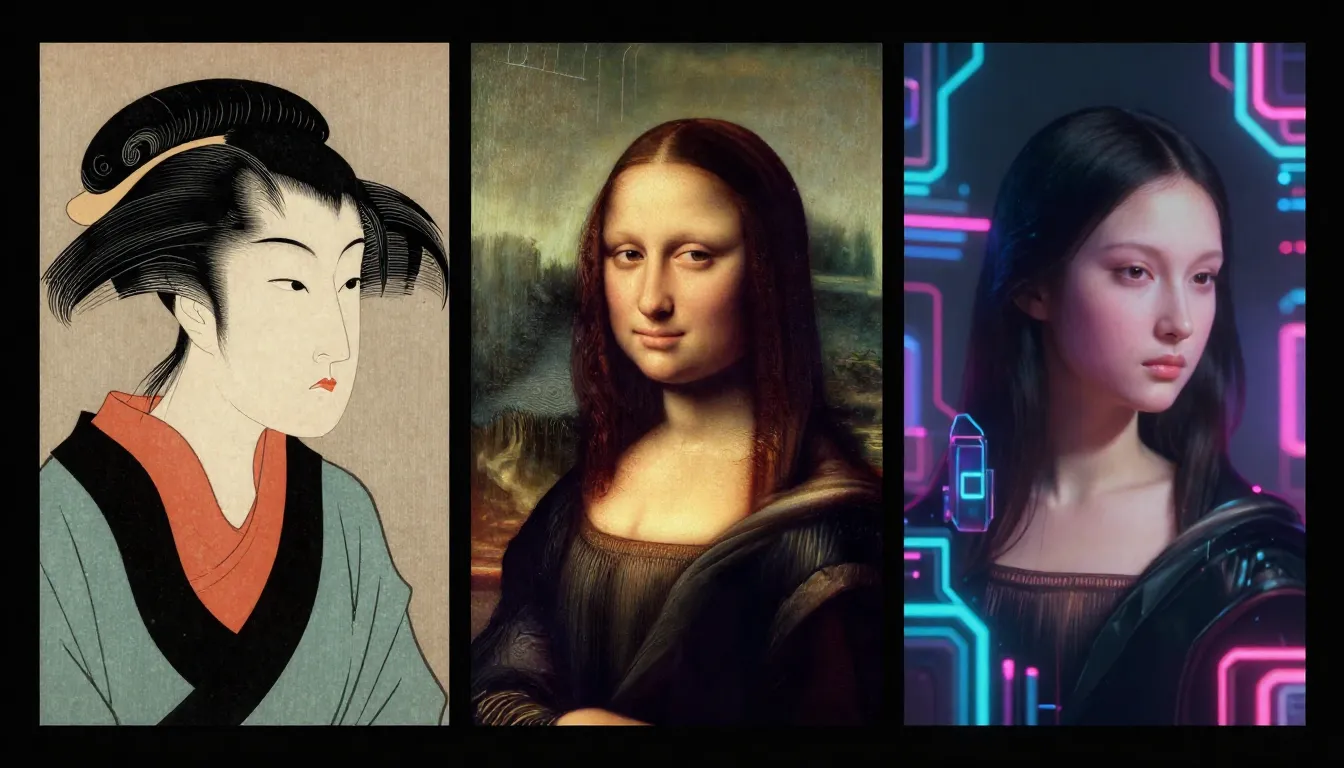
One reference image, three transformations. Image-to-Image lets you explore wildly different artistic directions from a single source — anime style, 3D figurine, and classical painting from the same starting photo.
Step 3: Use the Prompt Generator — Let AI Write Prompts for You
Here is a truth about AI image generation that many tutorials gloss over: writing good prompts is a skill, and most people are not naturally good at it. The difference between a mediocre image and a stunning one almost always comes down to prompt quality — but learning prompt engineering takes time and practice.
The Image Prompt Generator eliminates this learning curve entirely. It takes your casual, brief description and transforms it into a structured, detailed prompt that is optimized for AI image generation. Think of it as having a professional prompt engineer sitting beside you, translating your vague ideas into precise AI instructions.
How to Use the Prompt Generator
Step 1: Enter your brief description. You do not need to be detailed or technical. Describe your image idea the way you would explain it to a friend. "A magical forest at night" or "a futuristic city with flying cars" or "a cozy reading nook with a cat" — casual, simple, conversational.
Step 2: Select a style direction. The prompt generator offers style categories that guide the output toward specific aesthetics. Choose the style that matches your creative intent — photorealistic, digital art, anime, illustration, or others. This ensures the generated prompt includes style-appropriate descriptors and technical terms.
Step 3: Generate the prompt. Hit generate and the AI produces a comprehensive, multi-line prompt that includes specific subject descriptions, compositional guidance, lighting conditions, color palette suggestions, atmospheric details, and quality modifiers. The output prompt is significantly more detailed and technically precise than what most people would write on their own.
Step 4: Copy to Image Generator. Copy the generated prompt and paste it directly into the Text-to-Image tool. No editing required — the prompt is ready to use as-is. Generate your image and see the difference that a professional-grade prompt makes.
Why This Matters
The prompt generator is not just a convenience tool — it is a quality multiplier. Users who run their ideas through the prompt generator before generating images consistently produce better results than users who write prompts manually, even experienced users. The generator knows which descriptors, modifiers, and structural patterns produce the best outputs from the underlying Nano Banana AI models, and it applies that knowledge automatically.
This is especially valuable for beginners who have not yet developed an intuition for effective prompts. Instead of spending weeks learning prompt engineering through trial and error, you get professional-level prompts from day one. And for experienced users, it serves as a consistency tool — ensuring every prompt hits the same quality baseline, even when you are generating dozens of images for a large project.
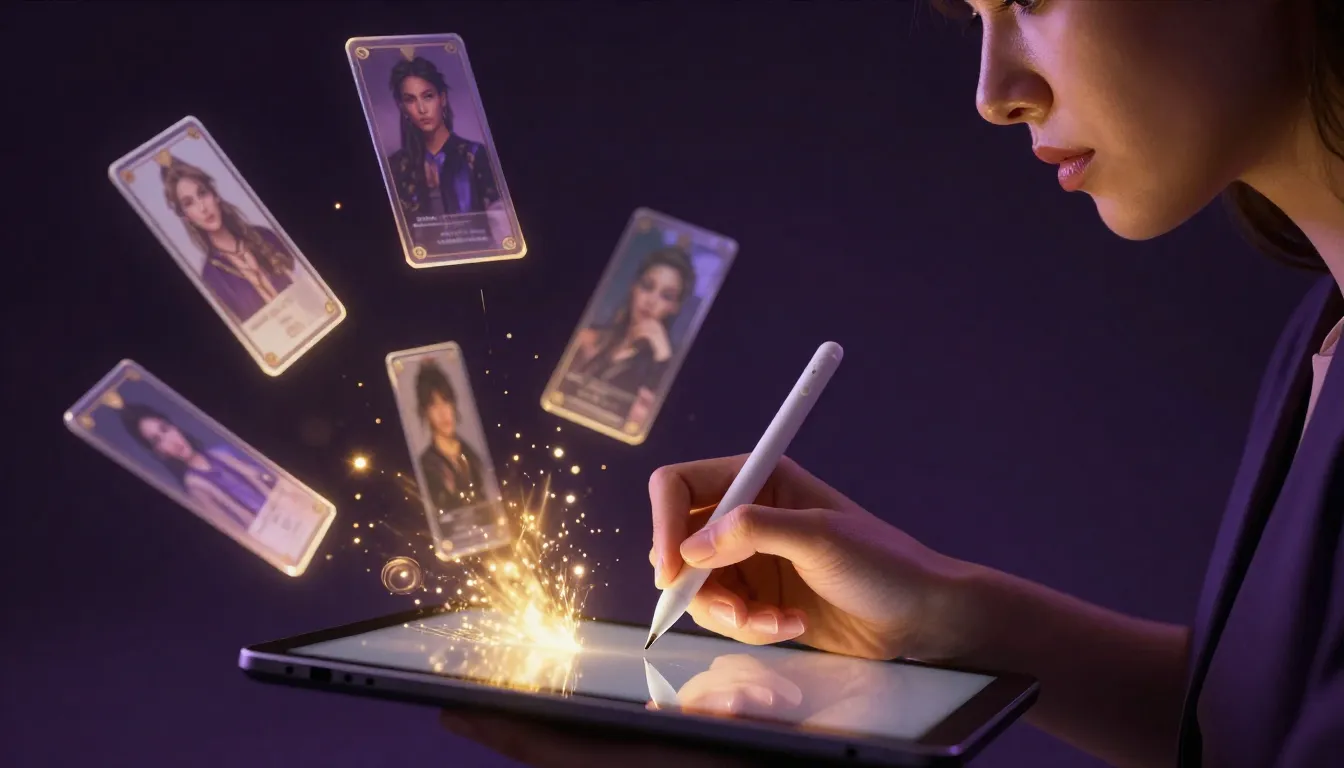
The Prompt Generator transforms your brief ideas into detailed, optimized prompts — bridging the gap between creative vision and technical precision without requiring prompt engineering expertise.
10 Essential Prompt Tips for Better Results
You can use the Prompt Generator for every image, but understanding what makes a good prompt will improve your results whether you write prompts manually or use them as a starting point for the generator. These ten tips represent the principles that separate amateur-looking AI images from professional-quality output.
1. Be Specific About Your Subject
Vague subjects produce vague images. "A woman" could be anyone — any age, ethnicity, clothing, expression, pose. "A woman in her 30s wearing a tailored navy blazer, hair in a loose bun, confident expression, standing with arms crossed" gives the AI a clear target.
The same applies to non-human subjects. "A house" is generic. "A mid-century modern home with floor-to-ceiling windows, a flat roof, surrounded by mature oak trees, twilight sky" is specific enough to produce something that looks intentional and designed.
Rule of thumb: if your prompt could describe a thousand different images, it needs more specificity.
2. Specify Lighting Conditions
Lighting is the single most impactful element in photographic and painterly images, yet most beginners leave it entirely to chance. Adding lighting descriptors to your prompt dramatically improves the mood, depth, and visual quality of your results.
Useful lighting terms: "golden hour sunlight," "soft diffused overcast light," "dramatic Rembrandt lighting," "neon-lit nightscape," "rim light separating subject from background," "moody low-key lighting with deep shadows," "bright and airy high-key studio lighting."
Each of these produces a fundamentally different mood and aesthetic from the same subject, so choosing your lighting is choosing the emotional tone of your image.
3. Choose a Clear Art Style
The AI can produce images in hundreds of different styles, but it performs best when you explicitly declare the style you want. Without a style directive, the AI makes its own choice — and its default may not match your vision.
Be explicit: "photorealistic photography," "Studio Ghibli animation style," "detailed digital fantasy painting," "minimalist flat vector illustration," "impressionist oil painting," "cyberpunk concept art," "vintage film photography with grain." The more precisely you define the style, the more coherent and intentional the output looks.
4. Use English Prompts for Best Results
AI image generation models are predominantly trained on English-language data. Prompts written in English consistently produce higher-quality, more accurate results than prompts in other languages. Even if English is not your first language, using English prompts (or using the Image Prompt Generator which outputs in English) will improve your results.
This does not mean non-English prompts fail — they can produce good images. But for the highest consistency and quality, English remains the most reliable prompt language for current-generation AI models.
5. Describe What You Want, Not What You Don't Want
Positive descriptions consistently outperform negative ones. The AI processes positive instructions more effectively than negative constraints. "A clean, organized modern desk with a single laptop" works better than "a desk without clutter, no mess, no extra items."
When you tell the AI what not to include, it first has to conceptualize the unwanted element and then try to suppress it — which often fails. When you tell it what to include, the path from instruction to image is direct and reliable.
6. Control Composition
Composition describes how elements are arranged within the frame, and it is a powerful tool that most prompt writers ignore. Adding compositional directives gives your images professional framing that elevates them beyond "AI-generated snapshot" quality.
Useful composition terms: "close-up portrait," "wide-angle panoramic view," "bird's eye view from directly above," "low-angle looking up dramatically," "rule of thirds with subject on the left third," "symmetrical composition," "negative space on the right side."
These terms are borrowed directly from photography and cinematography, and AI models understand them well because they were trained on millions of professionally composed photographs.
7. Add Quality Modifiers
Quality modifiers are terms that push the AI toward higher production value. They do not describe the subject — they describe the standard of execution. Including them consistently improves the technical quality of your output.
Effective quality modifiers: "professional photography," "cinematic quality," "4K ultra-detailed," "studio lighting," "award-winning," "high resolution," "masterful composition," "editorial quality," "cover photo quality."
Place these toward the end of your prompt. They act as a quality ceiling that the AI aims for during generation.
8. Reference Real Photography and Art Terms
AI models trained on captioned professional photographs understand photography and art terminology. Using these terms in your prompts gives you precise control over technical aspects of the image.
Photography terms that work well: "shallow depth of field," "bokeh background," "f/1.4 aperture," "35mm lens," "macro close-up," "long exposure," "HDR," "split toning," "cross-processed film."
Art terms that work well: "chiaroscuro," "impasto brushwork," "sfumato," "color blocking," "complementary color palette," "triptych layout."
You do not need to be a photographer or artist to use these terms — just include them in your prompt when you want the specific effect they describe.
9. Iterate: V1, V2, V3 Refinement
Your first prompt rarely produces your best image. Professional AI image creation is an iterative process. Generate a V1 image, evaluate what works and what does not, adjust the prompt, generate V2, refine further, generate V3. Most compelling AI images go through 2-4 iterations before they reach their final form.
The iteration process is fast and inexpensive. Each generation takes seconds and costs a few credits. Spending 5-10 minutes refining a prompt through iterations produces dramatically better results than spending the same time trying to write a perfect prompt on the first attempt.
Practical iteration workflow:
- V1: Establish the subject and composition.
- V2: Refine lighting, mood, and style. Add details that were missing.
- V3: Polish with quality modifiers and fine-tune the elements that are almost right.
10. Use the Prompt Generator to Accelerate
After absorbing the nine tips above, use the Image Prompt Generator to apply them all automatically. The generator incorporates these principles — specificity, lighting, style, composition, quality modifiers — into every prompt it produces. It is the fastest way to write prompts that follow best practices consistently.
This is not a replacement for understanding prompts. The tips above give you the knowledge to evaluate, modify, and improve generated prompts. But the generator gives you a head start that would take months of practice to achieve manually.
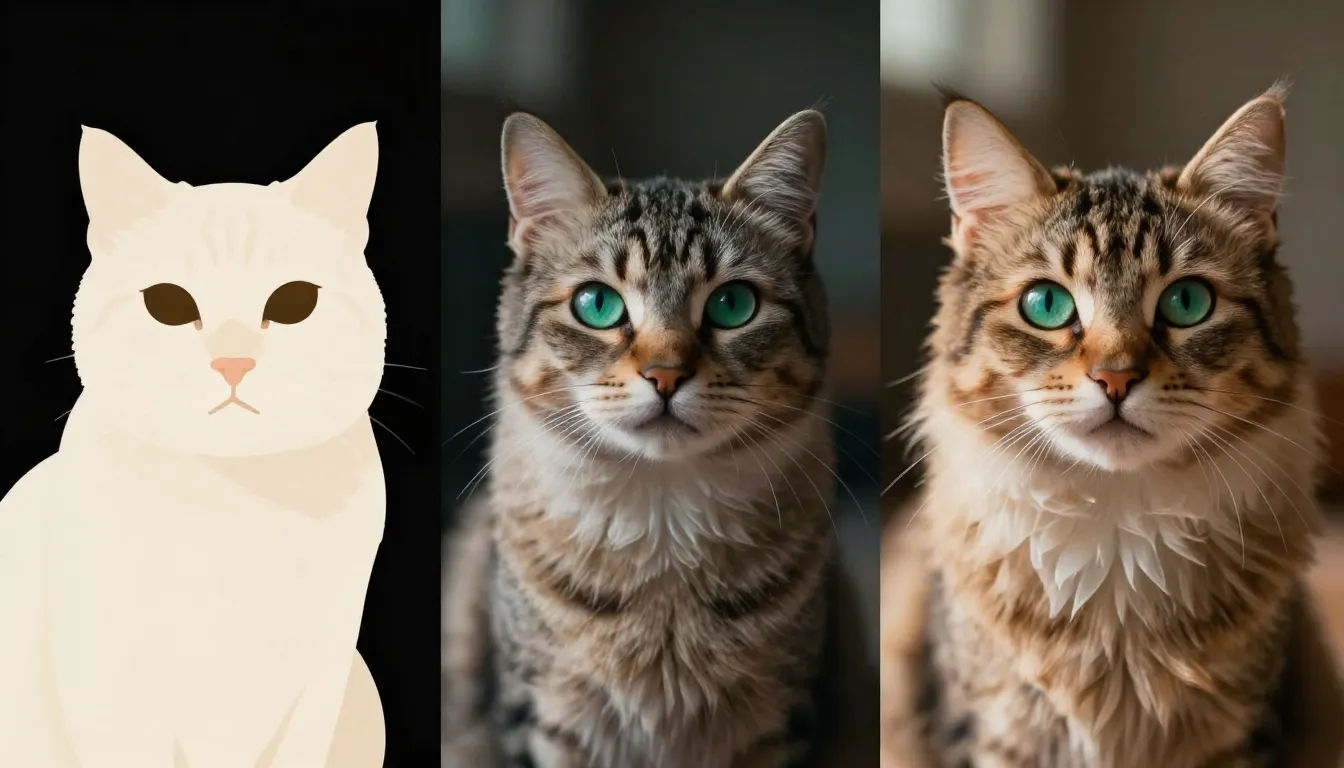
Iterative refinement in action: the same cat portrait concept across three prompt versions. V1 establishes the subject, V2 adds lighting and mood, V3 polishes with quality modifiers — each iteration building on the last.
Advanced: The Complete Nano Banana 2 Tool Suite
Now that you have mastered the basics — text-to-image generation, image-to-image transformation, and prompt optimization — let's zoom out and look at how the complete Nano Banana tool suite works together. Understanding the connections between tools unlocks workflows that are significantly more powerful than using any single tool in isolation.
The Six Core Tools
Text-to-Image is your starting point for creating new images from scratch. Any concept that begins as an idea in your head starts here. You write a prompt, the AI generates an image. Simple, direct, and the foundation of everything else.
Image-to-Image refines and transforms. It takes an existing image — whether a photo you uploaded, an image you generated with Text-to-Image, or any other visual — and modifies it based on your instructions. Style transfer, quality enhancement, mood adjustment, creative reinterpretation.
Image Prompt Generator writes prompts for you. Feed it a brief description, get back a detailed, optimized prompt ready for Text-to-Image. It is the bridge between "I have an idea" and "I have a professional-quality prompt."
Text-to-Video generates short video clips from text descriptions. When your creative need extends beyond static images into motion, this tool creates animated content from prompts alone.
Image-to-Video animates static images. Upload a generated or existing image and describe the motion you want. The AI brings the still image to life with camera movement, subject animation, and atmospheric effects.
Video Prompt Generator optimizes prompts specifically for video generation, just as the Image Prompt Generator does for image creation.
When to Use Which Tool
The choice of Nano Banana tool depends on where you are in your creative process:
- Starting from a blank canvas? Use Image Prompt Generator → Text-to-Image. Let the prompt generator handle the technical prompt writing, then generate your vision.
- Have a photo you want to restyle? Go straight to Image-to-Image. Upload it and describe the transformation.
- Generated an image that is close but not perfect? Send it to Image-to-Image for targeted refinement. Adjust the lighting, change the mood, enhance the details.
- Want to animate a still image? Upload it to Image-to-Video and describe the motion you envision.
- Need video content from scratch? Use Video Prompt Generator → Text-to-Video for the most efficient text-to-motion workflow.
How the Tools Connect
The real power of Nano Banana 2 emerges when you chain tools together:
The image refinement pipeline: Image Prompt Generator → Text-to-Image → Image-to-Image → Download. Start with an optimized prompt, generate a base image, then refine it through one or more Image-to-Image iterations until it matches your vision perfectly.
The image-to-video pipeline: Image Prompt Generator → Text-to-Image → Image-to-Image (optional refinement) → Image-to-Video. Your generated and refined image becomes the first frame of an AI-generated video, giving you precise control over the visual starting point of your video content.
The rapid exploration workflow: Text-to-Image with multiple generations from the same prompt → Image-to-Image on the best result. Generate 3-5 variations, pick the strongest candidate, then refine it further. Selection plus refinement is more efficient than trying to nail the perfect image in a single generation.
Each Nano Banana tool is valuable on its own, but the connections between them create workflows that are greater than the sum of their parts. This integrated approach is what sets Nano Banana 2 apart from platforms that offer only a single generation tool. For a deeper look at what makes Nano Banana 2 unique, see What Is Nano Banana 2.
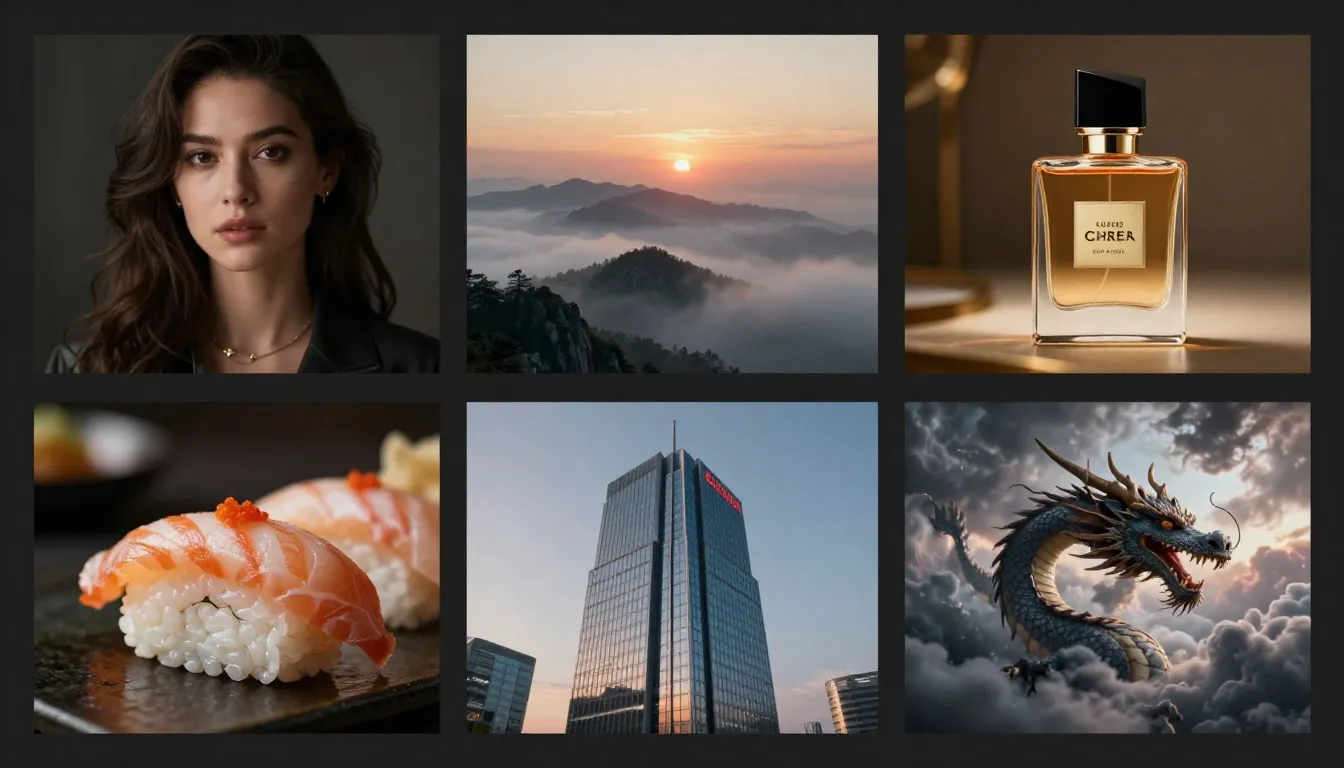
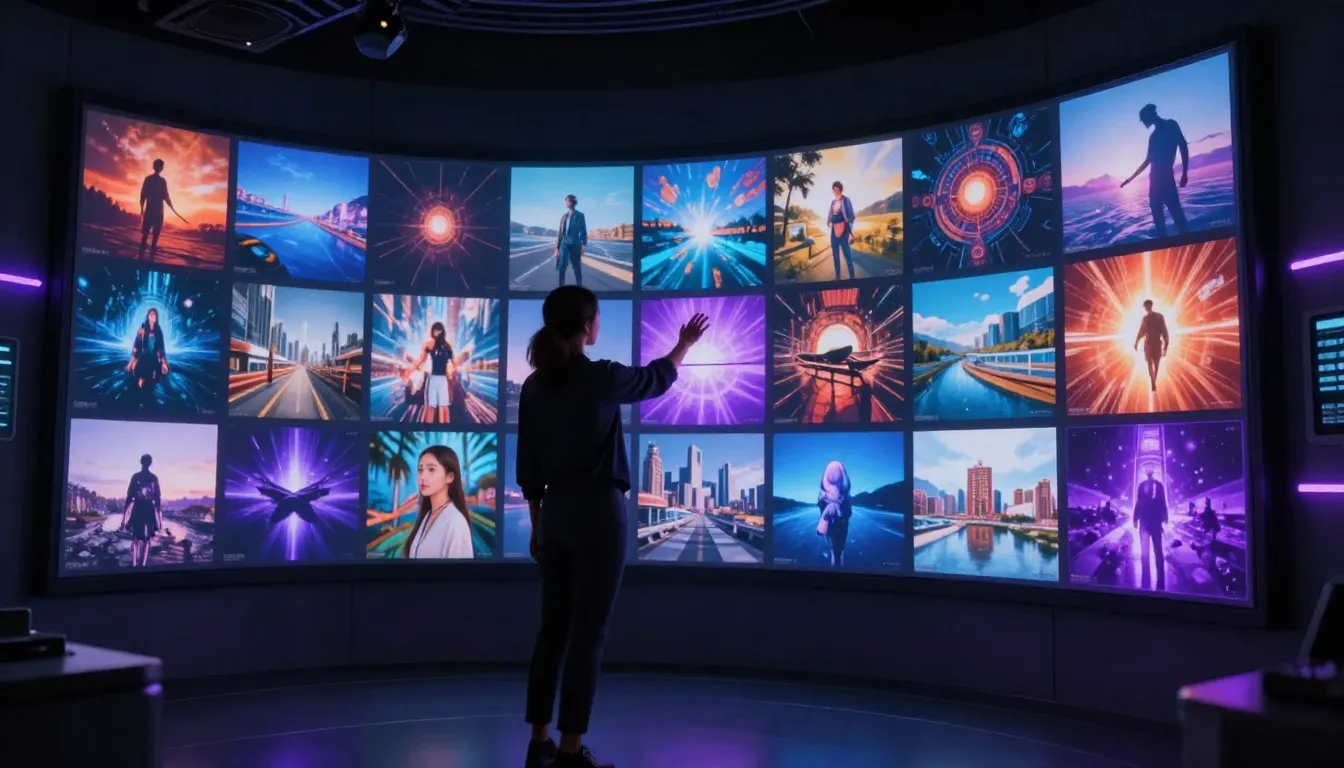
The Nano Banana 2 tool suite produces professional-quality results across every style — from photorealistic portraits and fantasy landscapes to anime illustrations and digital concept art.
Troubleshooting Common Issues
Even with the best tools, you will occasionally get results that do not match your expectations. Here is how to diagnose and fix the most common issues new users encounter.
"My Images Don't Look Like What I Imagined"
This is almost always a prompt problem, not a platform problem. The fix follows a predictable pattern:
Add more specificity. If the subject does not look right, describe it more precisely. Specify age, clothing, expression, pose, and physical details. If the environment does not look right, describe the setting, lighting, time of day, and atmosphere. The AI can only work with the information you provide.
Use the Prompt Generator. If you are struggling to write detailed prompts, let the Image Prompt Generator do the heavy lifting. Describe your vision in simple terms and let the AI expand it into a comprehensive prompt with all the technical details that produce professional results.
Try a different style. Sometimes the default style is not the right fit for your concept. A scene that looks mediocre in photorealistic style might look stunning in digital art or illustration. Experiment with style options to find the aesthetic that best serves your subject.
"The Quality Is Not High Enough"
If images look soft, blurry, or lack detail, try these adjustments:
Add quality modifiers to your prompt. Terms like "ultra-detailed," "4K resolution," "sharp focus," "professional photography," and "masterful quality" explicitly push the AI toward higher-fidelity output. Place them at the end of your prompt.
Check your aspect ratio. Extremely wide or tall aspect ratios can stretch the AI's generation capability, sometimes resulting in lower detail density. Standard ratios like 1:1, 4:3, 3:4, 16:9, and 9:16 tend to produce the sharpest results.
Simplify a complex scene. If you are asking for many subjects, intricate backgrounds, and elaborate details all in one image, the AI has to distribute its generation capacity across many elements. Simplifying the scene — fewer subjects, cleaner composition — often produces higher quality per element.
"The Style Doesn't Match What I Want"
Be explicit about the style in your prompt. Do not rely on the style selector alone — reinforce it with style-specific descriptors in the prompt text. "Watercolor painting with visible brushstrokes, wet-on-wet technique, soft edges" gives the AI much more style guidance than just selecting "Watercolor" from a dropdown.
Reference specific artists or movements. Terms like "in the style of Art Nouveau," "Impressionist painting technique," or "cyberpunk aesthetic" tap into the AI's training data and produce more stylistically coherent results than generic style labels.
Use Image-to-Image for style transfer. If you have a reference image whose style you want to replicate, upload it to Image-to-Image and describe the style elements you want applied to a new subject. This is the most precise way to achieve a specific visual style.
Frequently Asked Questions
How do I start using Nano Banana 2?
Visit nanobanana2app.com, create a free account with your email or Google sign-in, and navigate to the Text-to-Image tool. Type a description of the image you want, choose a style and aspect ratio, and click Generate. Your first AI image will be ready in under 30 seconds. No software installation, no configuration, and no credit card required to start. The entire platform runs in your web browser.
Is Nano Banana 2 free for beginners?
Yes. New accounts receive free credits that cover multiple generations across all tools — text-to-image, image-to-image, prompt generation, and video creation. The free credits are enough to explore every feature of the platform and create a meaningful collection of images before deciding whether to purchase additional credits. There is no time limit on when you use your free credits, and no feature restrictions — free-tier users have access to the same tools and quality as paid users. See our pricing guide for full details.
What is the best prompt format for Nano Banana 2?
The most effective prompt format follows this structure: start with the subject and its key attributes, then describe the setting or environment, add lighting conditions, specify the art style, include mood and atmosphere descriptors, and finish with quality modifiers. For example: "A fluffy golden retriever puppy playing in autumn leaves, park setting with maple trees, warm golden hour sunlight, shallow depth of field, photorealistic, joyful energetic mood, professional pet photography, ultra-high quality." Alternatively, use the Image Prompt Generator to automatically create optimized prompts from brief descriptions.
How many images can I generate for free?
The number of free images depends on the credit allocation for new accounts and the per-generation cost of each tool. Generally, free credits are sufficient for 10-20+ image generations, giving you ample room to experiment with different prompts, styles, and tools. Each generation costs a few credits, and you can track your remaining balance in your account dashboard. When you exhaust free credits, affordable credit packages are available on the pricing page.
Can I use Nano Banana 2 on my phone?
Yes. Nano Banana 2 is a web-based platform with a responsive design that works on smartphones, tablets, and desktop computers. No app download is required — simply open nanobanana2app.com in your mobile browser, log in, and you have full access to every tool. The mobile experience is optimized for touch interaction, and you can upload reference images directly from your phone's camera roll for Image-to-Image transformations.
How do I improve my AI image quality?
Focus on three areas: prompt specificity, quality modifiers, and iterative refinement. First, make your prompts more detailed — describe the subject, lighting, composition, and atmosphere with precision rather than leaving details to chance. Second, add quality modifiers like "4K," "ultra-detailed," "professional photography," and "sharp focus" at the end of your prompt. Third, iterate — generate multiple versions, identify what is working and what is not, adjust your prompt, and regenerate. Each iteration brings you closer to your vision. For an in-depth guide to creating higher-quality images, see our Nano Banana 2 Image Editing Guide.
What's the difference between Text-to-Image and Image-to-Image?
Text-to-Image creates images from scratch based on a text description. You start with nothing but words and end with a generated image. Image-to-Image transforms an existing image — a photo, a design, or a previously generated image — based on your instructions. Use Text-to-Image when you want to create something new, and Image-to-Image when you want to modify, restyle, or enhance something that already exists. The two tools complement each other: generate a base image with Text-to-Image, then refine it with Image-to-Image for maximum control.
Can I use Nano Banana 2 without writing prompts?
Yes. The Image Prompt Generator lets you describe your image idea in plain, casual language — even just a few words — and produces a detailed, optimized prompt that you can copy directly into the image generator. You also have Image-to-Image, which lets you upload an existing image and describe a simple transformation ("make it look like anime" or "change the mood to moody and dramatic") without needing any prompt engineering knowledge. Between these two tools, you can create professional-quality AI images without ever learning formal prompt writing.
Start Creating Now
You now have everything you need to create stunning AI images with Nano Banana 2. You understand the three core tools — Text-to-Image for creation, Image-to-Image for transformation, and the Prompt Generator for effortless prompt optimization. You know the ten prompt tips that separate amateur results from professional quality. You understand how the tools connect into powerful workflows. And you know how to troubleshoot the most common issues.
The only thing left is to start creating. Your first image is minutes away.
Create your first AI image → — open the Text-to-Image tool and generate your first image right now. Start with a simple prompt, see how fast the process is, then apply the prompt tips from this guide to push your quality higher.
Let AI write your prompt → — if you want professional results without mastering prompt engineering, start here. Describe your idea in a few words, get back an optimized prompt, and generate an image that exceeds your expectations.
Transform an existing photo → — upload a photo from your camera roll and watch it transform. Apply artistic styles, change the mood, or reimagine the entire scene with a single prompt.
Explore more examples and techniques → — see what other creators have made with Nano Banana 2 and get inspiration for your next project.
Whether you are a designer creating concept art, a content creator building a social media presence, a marketer producing visual campaigns, or simply someone who wants to bring creative ideas to life — Nano Banana 2 gives you the tools to do it faster, better, and with less friction than any other approach.
Start creating. You will be surprised at what you can make.